At the same time, often on furniture, like you bought at IKEA, they are installed so called telescopic directly. It’s nothing, the design is really bad, but it won’t get out of hand. Abo in the kitchen for the boxes can zakotitis small items And the stench just won't curl normally. Zagalom, and in the first and other moments, they were taken, but the axis did not know how to understand! Today I will try to describe the process as simply as possible.
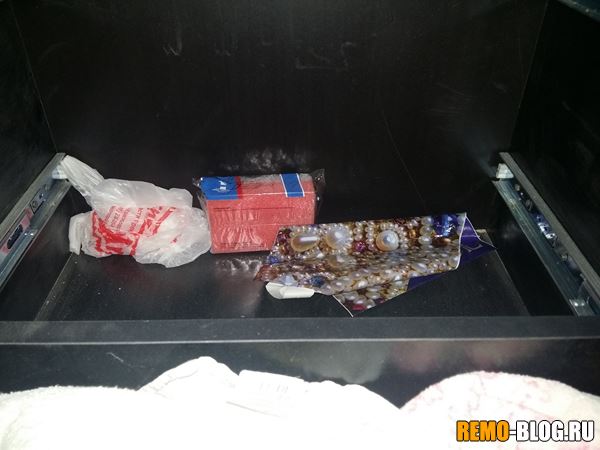
I was especially vigilant in order to tidy up the packages, as they fell in the back and did not allow the middle ones to curl up normally. It’s impossible to put your hand in the oskelki (open the bottles), then you had a chance to pull them out.
The process of "drawing" the box is really simple. Installers install q_ boxes in a few seconds. Father:
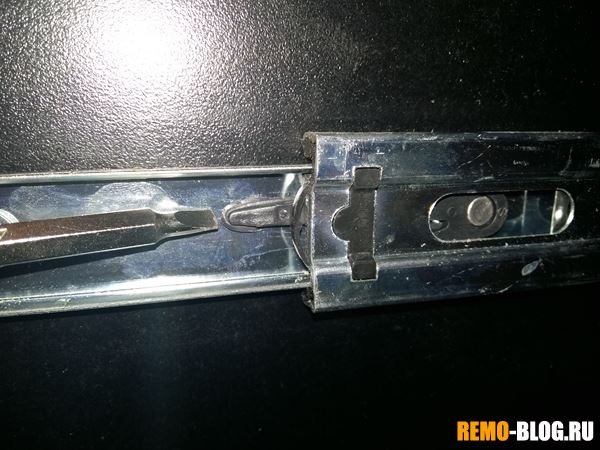
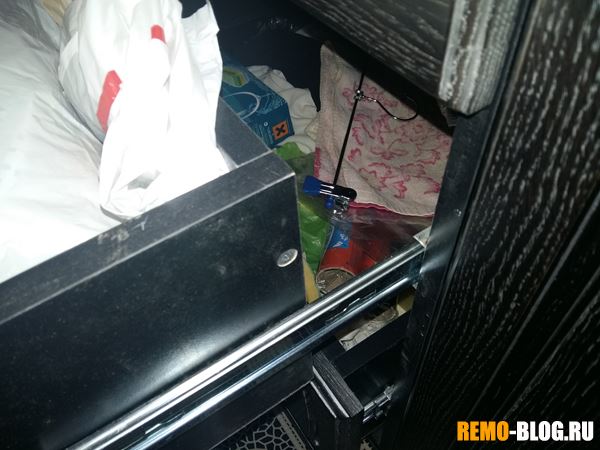
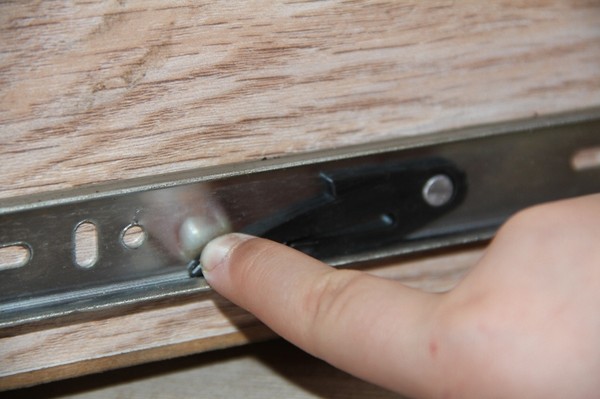
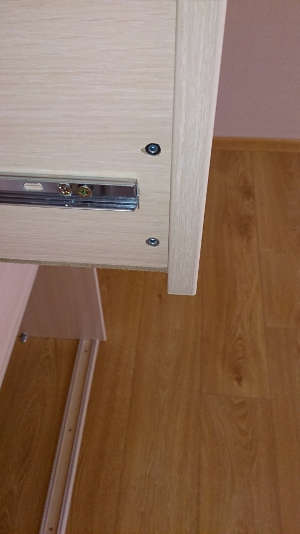
1) At the skin boxes, two in a straight line. We need to hang yoga to the maximum in order to have plastic fastening at the special end. Axis of stink marveling at the photo.
![]()
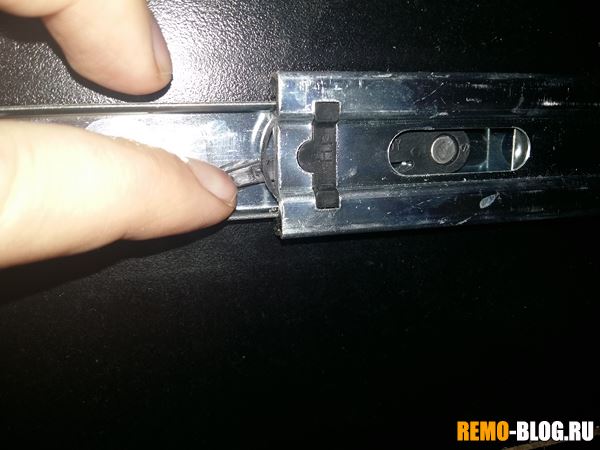
2) Now we lower the plastic "mustache" to the bottom, and pull it on yourself, so that you name it. I would like to know that even the constructions in some cases must be pulled down, prote є and mirror options, in them one is pulled down, the other one is uphill, only the same is all the way. It’s easy to overthink, as if from one side you don’t want to descend, it means that it’s hard to just uphill!
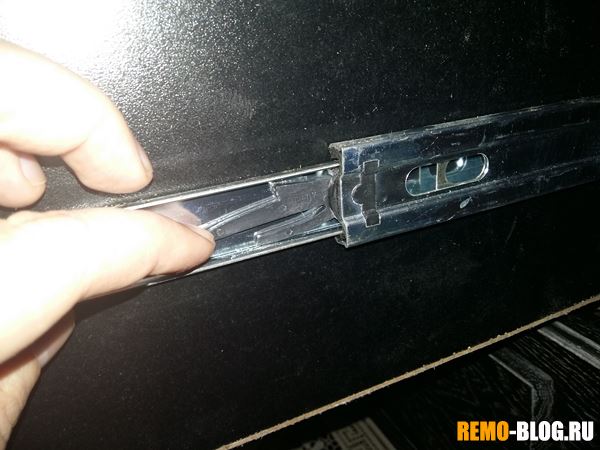
3) Now we need to lower this old little thing down, like a right-hander, so angry. І draw a box. Vin smoothly can move out of his direct lines.
5) After that, everything is repeated in the reverse order, it is simply inserted into the runners and stitched until it clicks. Tse tell us about those who flickered. Now you can speed up.
How to bachite nothing foldable, finish an easy and simple process. There is not much more to write especially, I think you have grasped the very idea.
On tsomu zakіnchuvatimu, marvel and read our budіvelny site.
As such a necessity, do not hesitate, You can do everything independently - take a picture and put it on a plate! In our house, the bulk was crushed more than once. first time furniture boxes knowing if the shafa was called new. Fakhіvtsі furniture firms incorrectly set the position of direct roaming in the set of children's room. Through tse vin (box) constantly vizhdzhav, mimicking vіdkrivavsya. Let's break it down, and then I'll show you at the video instructions, how to repair everything ...
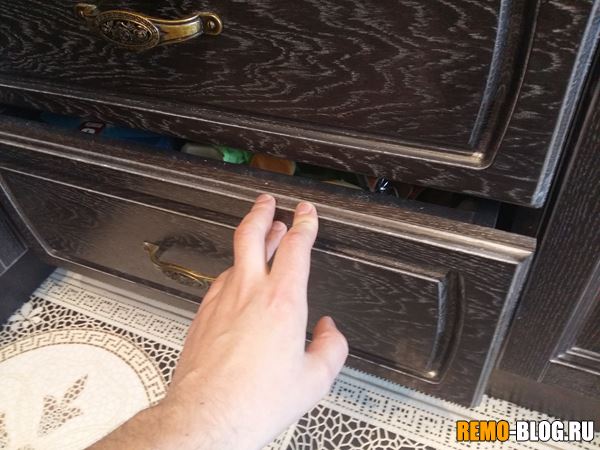
Otzhe: we called on the back to the furniture company, but they couldn’t get them to mind, so that the master would come and fix everything. They said goodbye to him once and for all from this organization, having done everything independently. I don’t think I’ll understand, how to pull a box out of the “guides”. Everything turned out easy! It is necessary to pull the box up to the stop as much as possible, or call the plastic “tongues” to hang.
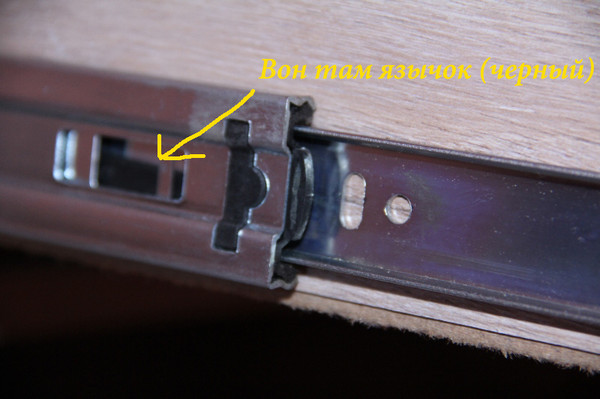
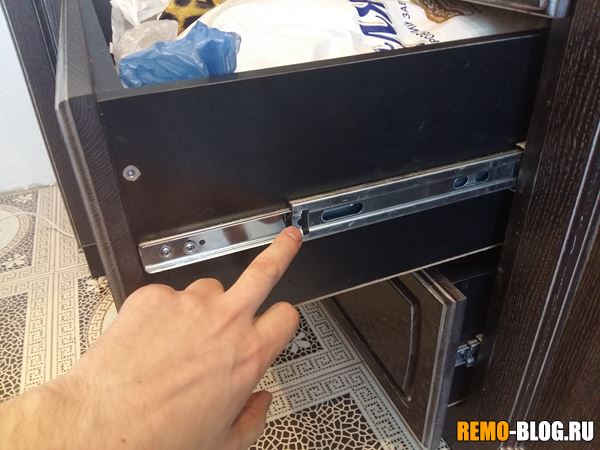
The tongue "sits" on a bolt, approximately like an arrow of a year-old, only slightly narrower in shape. Move the "arrows" to block the head straight and do not let the box fall at the selected station. To understand the mechanism, it is necessary to pull the tongue against the anti-godinnikov arrow and draw the box.
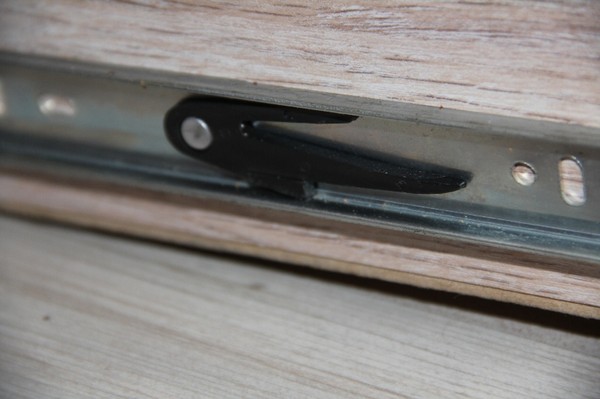
Evil "tongue" is dragged uphill.
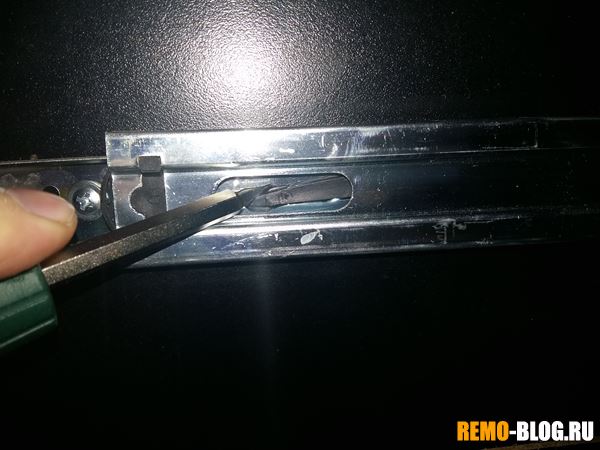
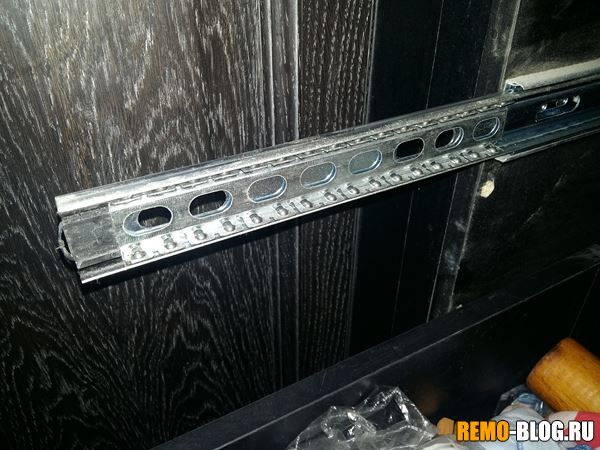
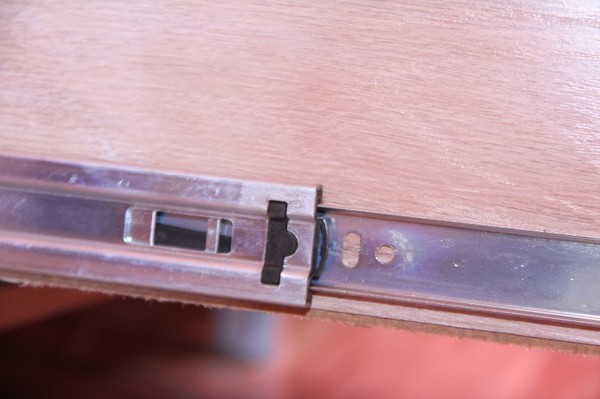
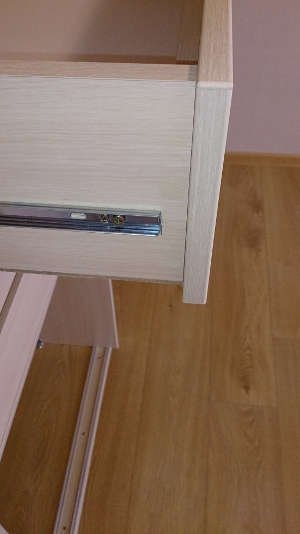
Mekhanizm vykochuvannya - right side view
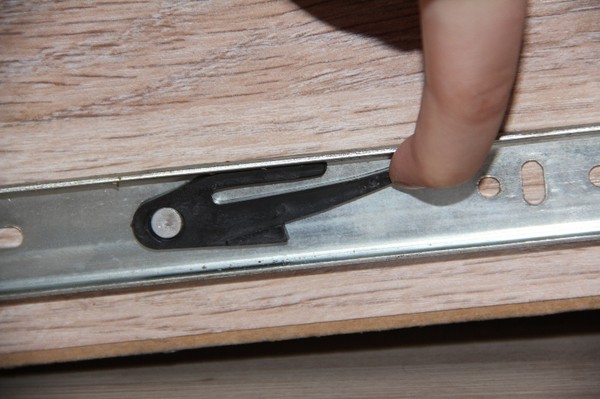
And the right-handed tongue is pulled down ... Vikochuvannya (vin is visuvny) it is easy to get off the straight lines.
I stopped for the help of "equal" camp of these direct ones. As if letting go, the stench was installed crookedly. Having twisted a couple of self-tapping screws on the back, those that are in a clay frame. Well, I’ll know again with the “equal” having put it in the correct position, having changed, that the movement of the box is not important, screwing and picking up the furniture.
How do you repeat this, please, so that the “guides” have become on the floor in the receiving bays. If it curls tightly, then, perhaps, it became crooked. It’s better to revise it! If everything is in its place, then it works fine! What is the same way of sorting out and folding in a good way, like from an overwhelmed box back wall, and need fast delivery. This is the principle of police computer desks.
Video instructions about how to take the box out of the skids. Knowing by phone, it is better to use a normal video camera>>> .
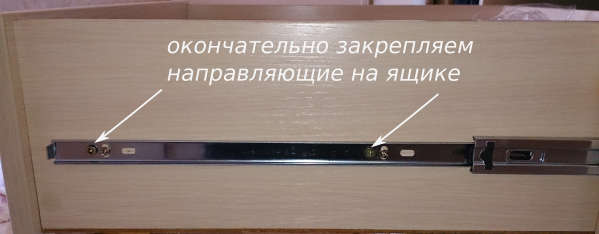
The back of the head is zrobimo "reconciliation" - zrobimo regulation of horizontality and depth of installation in the frame, then and residually fixed directly on the hanging boxes.
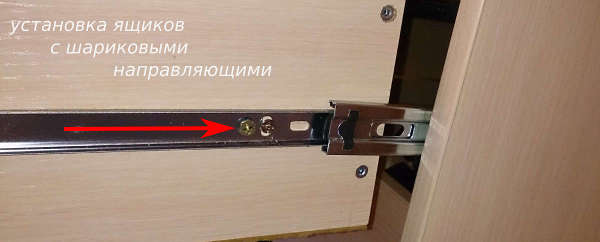
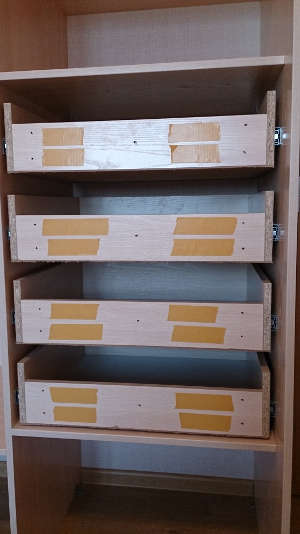
One by one, everything is installed in the wardrobe of the wardrobe previously selected hanging boxes in the sequence described below.
1. I’m more “struggling” with the dry parts of the direct vіdpovіdny box fixed on the walls of the frame.
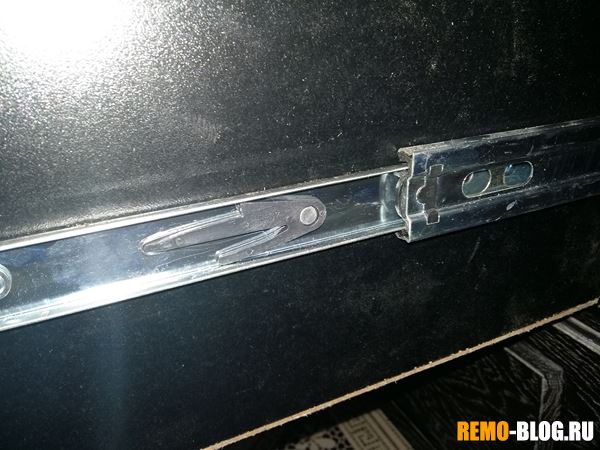
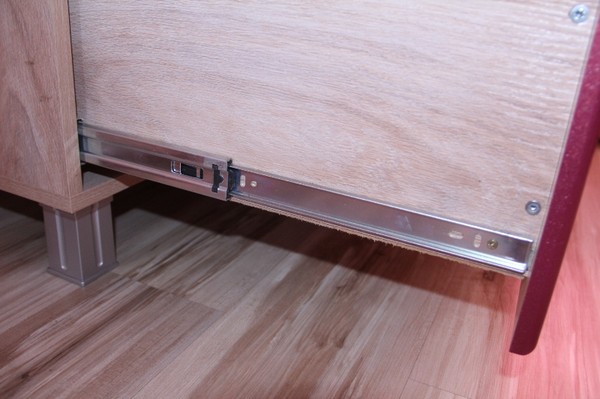
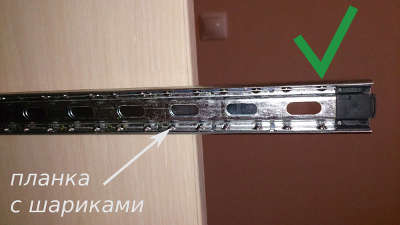
2. A plank with bags in the middle of the skin directly hanging "named" until it stops. Only for such a position, the box will comfortably stand in its place.
The photo below shows the correct and incorrect position of the plank with bags on the straight line for the installation of a hanging screen.

3. The pick-up box is carefully inserted into the frame, one by one "halves" of sack straight, fastened to the box, with parts of straight straight, fastened to the walls of the frame. Shove the box to the end.
Here it is important, without zusil, to carefully wreck the box, ember the shafi, without brutal respect for those, in what order the details of the guides that are wrecked will be "put in".
Kulkovi direct for hanging boxes secured in such a way that even the details of the direct fittings on the drawers are correctly inserted at the guide parts on the frame walls, directly on the shoes and tongues "get out" correctly.
If the box is rebuvatima mayzha in the tucked position, it will be necessary to report a small susilly to shove the yogo all the way. At this moment, the “halves” of the skin guiding are fixed and the guiding ones are supported at the selected station.
In the same way, we install three boxes that are missing.
Verify head screen. If our rozrahunki were wicked correctly, then the boxes will be free.
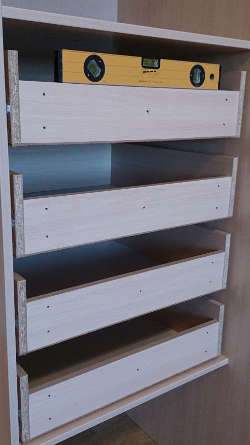
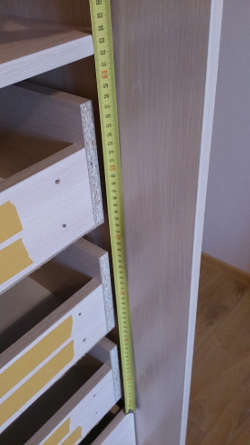
Checking the horizontality of the boxes. Even if the ventilation is not significant, it is not necessary to carry out the adjustment of horizontality - such adjustments are compensated when the facades are installed in the drawers.
However, the opening is large (one edge of the drawer is 1 mm wider than the protilene one, lower by 1 mm), we can remove the junk, we can loosen the screws in the "oval" openings of one of the straight ones, the trochs can be destroyed directly uphill or down (let the edge go down or down, fortunately), vіdhilennya vіd horizontality.
Tighten before loosening the screws. We insert the box in its place, re-verify its horizontality.
Adjustment of hanging drawers in the closet according to the depth, if necessary, you can build after the installation of facades. I didn’t need to adjust the depth according to my mood.
Now you can move on to the very, sing-song, final stage of installing hanging drawers - reconciliation and installation of facades.
In addition, the installation of facades will be installed as soon as possible, rich in which we lie old look closet wardrobe.
The installation of facades on the hanging boxes is almost from the “priming” - from the bottom screen.
We take the detail to the facade and apply it to the front wall of the lower screen.
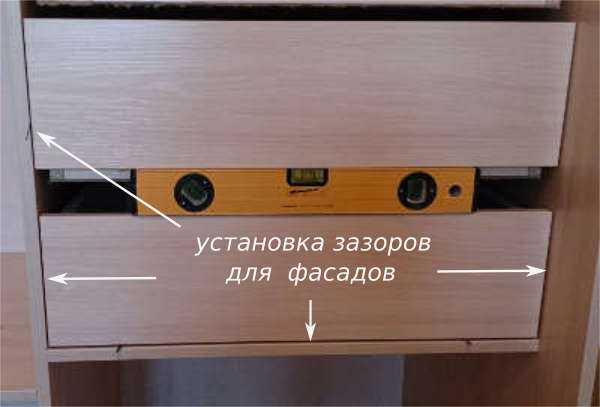
Assess the gaps between the facade and the walls are right-handed and left-handed. For the purpose, I used two drills with the same diameter of 3 mm (div. photo), lining the front of the right-handed and left-handed. Why drill 3 mm? That is why I planned such a gap between the lower police and the facade of the lower screen.
The facade can be “rolled” on the drills to the right and to the left, choosing the size of the air gaps. At the same time, the gap below between the facade and the lower police is permanently filled, and it can be seen from the bottom - along the entire width of the box.
For greater emphasis, I put the facade of the other drawer at the bottom, putting it on the bud line, which lies on the upper end of the facade of the lower drawer. Having offended the facades, they also “rolled” on the sverdl - it was not necessary for me to marvel, as if looking at the sides of the side gaps. Even the walls in our butt are different, and the same gaps between the walls and the facade will look different (div. photo).
As a result, the gap between the gap of the troch is smaller for the rozrachunkovy - 1.5 mm instead of 2 mm. To install the beater gap, also use a drill bit - 1.5 mm.
In this order, with the installation of facades in all drawers, focusing on the gap of the wall, which is more than 1.5 mm.
As soon as they were distinguished from the gaps, you can proceed without intermediary until the facades are installed on the drawers.
For which we will use double-sided tape and 30 mm bolts.
Adhesive tape one side on the front walls of the boxes. We still don’t know about the past papier from another sticky ball with scotch tape.
Once again, we reconcile the facade of the lower screen with the adjustment of the gaps of the right-handed and left-handed.
As if everything is safe, we know that papyrus from another sticky ball of adhesive tape pasted on the bottom drawer, we carefully put the lower part of the facade on a 3 mm drill bit under the frayed top part of the drawer. First, carefully turn the upper part of the facade at the side of the box, while trimming the lower part of the facade to the box.
At the entrance to the facade, open it, insert a 1.5 mm drill into the gap, press it to the new left side of the drawer facade, carefully, without squeezing the facade to the front wall of the drawer with all its flatness.
Revisiting the horizontality of the installed facade. As if the facade was standing strictly horizontally, and the gaps vlashtovuyut us, with force we press on the facade, so that the adhesive tape sticks better to the new one.
If the facade is not installed horizontally, we know that it is being installed again. If it will be necessary, scotch tape is minyaemo. Robimo tsyu operation doti, docks the facade does not stand up horizontally with the required gaps at the bottom and along the edges.
We sweat carefully, without applying susilla to the still only glued facade, we hang the lower shukhlyad, and in the middle screwed into the facade through the front wall with a pair of screws 30 mm, thus fixing the facade on the box (div. photo).
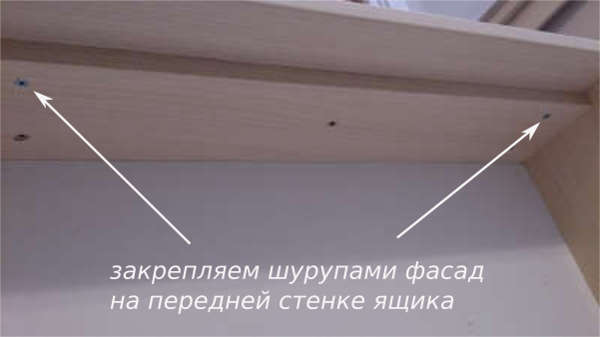
The other screws are screwed in after we install the facades of all boxes.
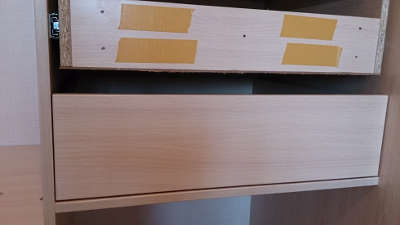
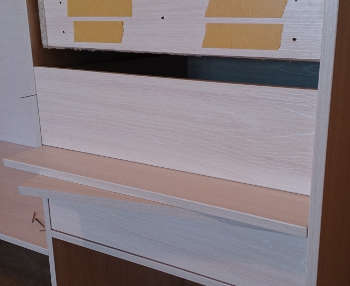
Dali vimiryuєmo vіdstan between the upper part of the facade, installed on the lower drawer and the lower plane of the police above the drawers. We need to make sure that the gaps between the facades and the police are the same (div. photo).
Vіd otrimanoї vіdstanі vіdnіmaєmo vіsotu façadeіv і three koshіv, scho sho sho sho vіdnії і dilimo 4 - іlkіstyu gaps.
In my case, the gaps were equal to 35 mm, so they are in the same condition up to the roses.
Starting from another bottom of the facade And above all, the facades of the leather shukhlyad will be installed, laying between the installation and the lower installed facade gasket - a kind of template.
As such a gasket, I beat up scraps of laminated chipboard 16 mm with a gasket with corrugated cardboard (3 mm) between them. At once, 35 mm came out (div. photo, corrugated cardboard is not visible there - there are no gaskets between parts from chipboard).
The procedure for installing a skin stepping facade is the same as for the lower screen. We can only fix it by installing the facade on a gasket-template of a 35 mm curl, and not on a drill.
After the installation of all the facades, we will reconsider that at the closed station the boxes are vertical and horizontal.
Residually fasten facades- screws are screwed in at the facade in the middle of the drawers, which are missing 30 mm.
Residually fasten on the boxes straight. Screw-in screws 4x16 mm in round holes in "halves" straight, mounted on drawers. Boxes in front of the cim are better than taking them.
We put boxes on їхні places near the frame.
Later, all the boxes are installed and virivnyan (divine photo).
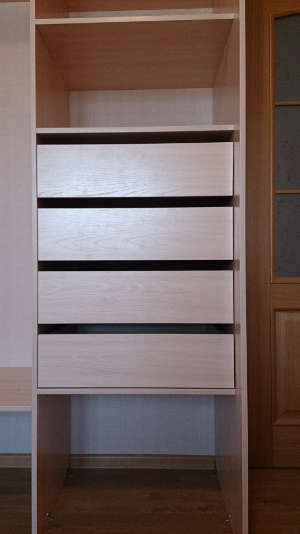
It is closed (glued) with caps on the paper, which is self-adhesive, visible with hanging boxes are drops of confirmations (divine photo).
Passable to the details from the profile For open doors built-in wardrobe.